Control an LED with the Raspberry Pi and via the web
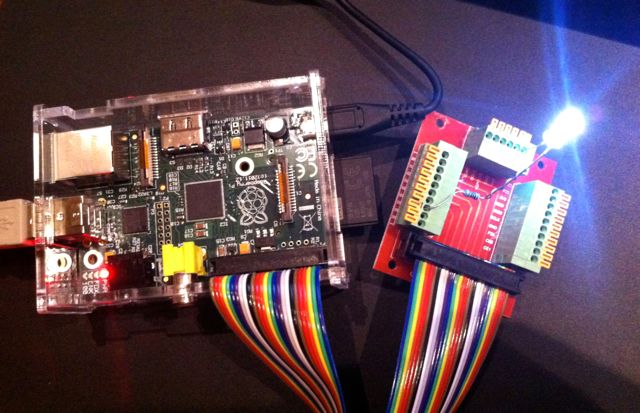
What a great little device the Raspberry Pi is! After my initial setup it is time to play around with the input and output pins. The first example has to be to switch on an LED. This can also be done remotely via a web interface and better, I cannot only switch the LED off, but the whole Raspberry Pi as well.
Thanks to the work of many others, it is straightforward to control the GPIO (General-purpose input/output) pins. Gordon’s Project site shows how this can be done with his wiringPi library. For testing purposes I use an LED and a small resistor on pin 17. To control the LED it is as simple as:
gpio mode 0 out
gpio write 0 1
gpio write 0 0
I can also use a browser to control the pins. The webiopi projects provides an out-of-the-box solution for this. That means, I can control the pins from any other device in the network, such as my mobile phone!
Even better, I can switch the Pi off from my phone as well. Daniel Pecos presents a little script and layout that shuts the Pi down via a physical button on pin 4. But, I can also use my phone via webiopi; with Daniel’s script running in the background, I can set pin 4 to input, tap it and the Raspberry Pi will shutdown.
Citation
For attribution, please cite this work as:Markus Gesmann (Feb 11, 2014) Control an LED with the Raspberry Pi and via the web. Retrieved from https://magesblog.com/post/2014-02-11-control-led-with-raspberry-pi-and-via/
@misc{ 2014-control-an-led-with-the-raspberry-pi-and-via-the-web,
author = { Markus Gesmann },
title = { Control an LED with the Raspberry Pi and via the web },
url = { https://magesblog.com/post/2014-02-11-control-led-with-raspberry-pi-and-via/ },
year = { 2014 }
updated = { Feb 11, 2014 }
}

